Monday, August 4, 2014

Supersonic Kale Salad with Smoked Tofu

Jenn was super excited making this. It basically has all of the ingredients you wish you had on hand to make a kale salad but (at least for us) usually never do.

Jenn works close to this super cheap healthy grocery store, that has ridiculously cheap produce, so this salad only comes to around $15 to make (for 4-5 servings), not too bad!

The end result was so so good, rich, and filling. We love using tahini as a dressing, it tastes so creamy and nutty but is totally healthy for you!


This recipe makes ALOT, so you'll probably have leftovers throughout the week, or you'll eat it all at once like Jenn and I did…:P

1 bunch of curly kale (broken down with 1 tbsp lemon juice, salt and 1 tbsp olive oil)
1 carton cherry tomatoes, halves
8 button mushrooms sliced
1 yellow zucchini, sliced
1/4 red onion, sliced.
1/2 container smoked tofu, sliced
1 red apple, cubed
1 avocado, sliced (for topping)
1/4 cup sunflower seeds (for topping)

Tahini dressing:
1/3 cup tahini
1 tbsp olive oil
2 small cloves garlic, crushed and minced
1-2 tbsp apple cider vinegar
Salt and pepper
Chili flakes (optional)

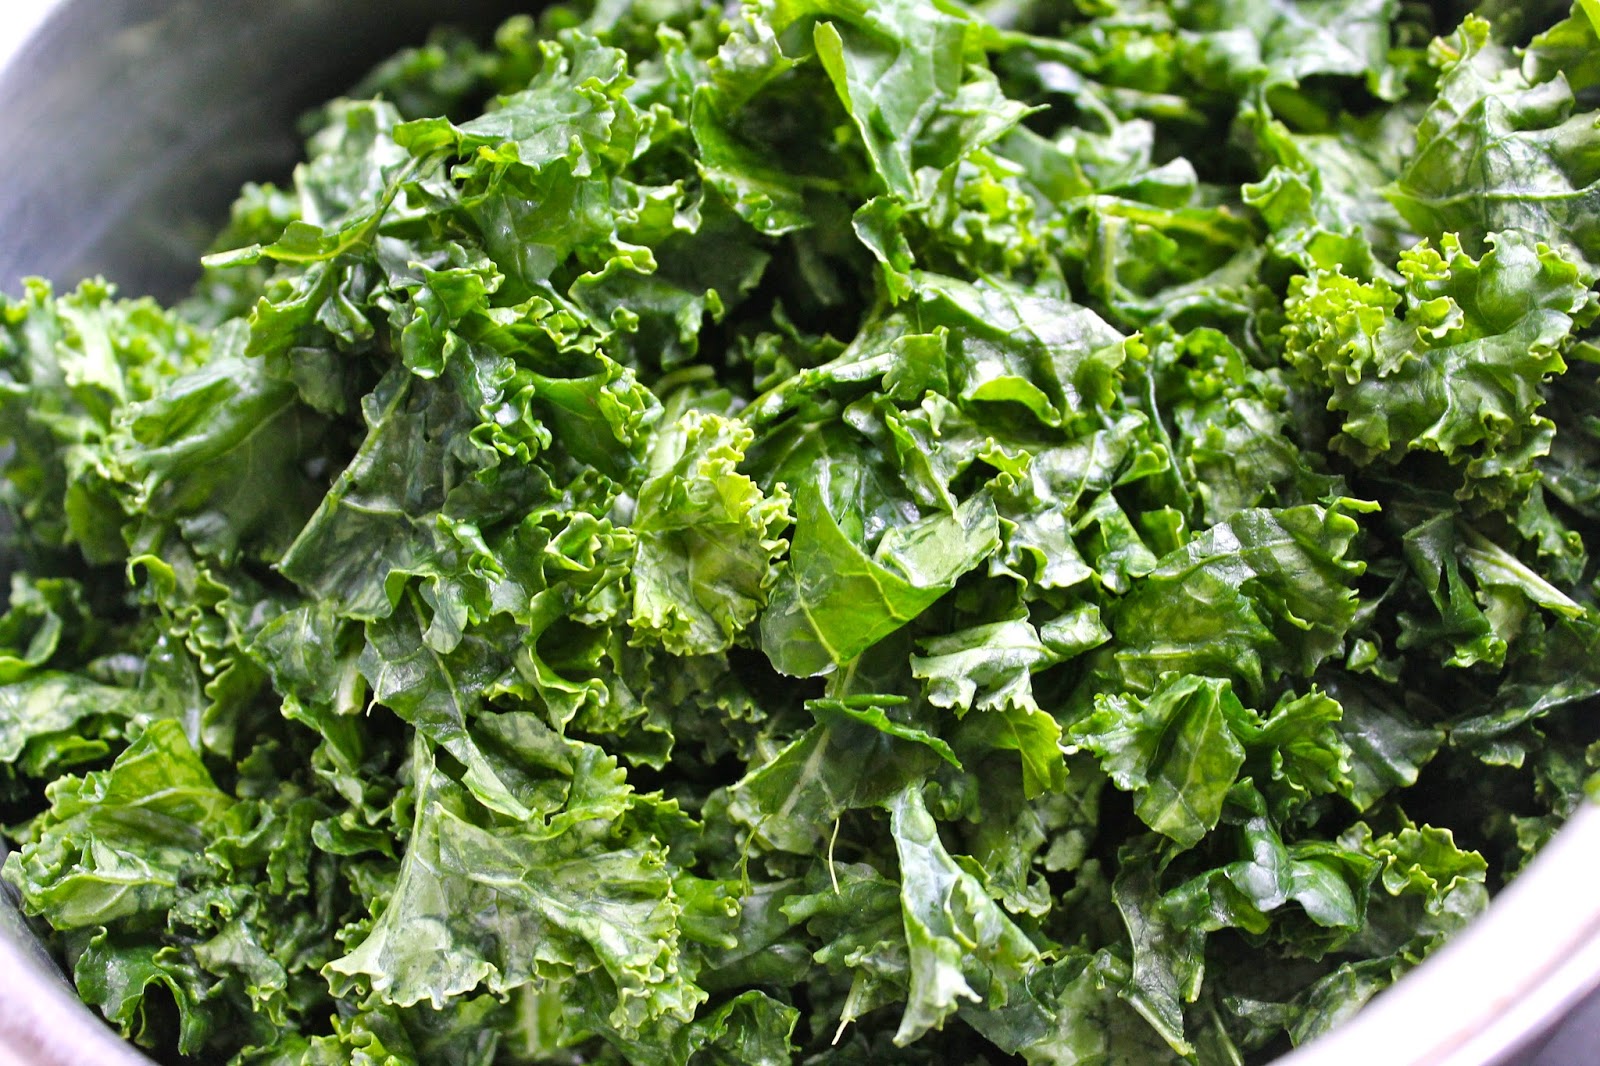
Start by breaking down the kale by massaging it with olive oil, salt and lemon juice. Prep ingredients. Sautee mushroom, zucchini with some olive oil in a pan (make sure to salt them so that it releases its liquid), after 2-3 minutes, add smoked tofu and cook until heated through and vegetables are done. Set aside veg and tofu on a paper towel. Drain out liquid from pan, add a little bit more oil and add in sunflower seeds to toast.

For dressing, if you have a food processor, processor everything together, if not you can easily just whip it with a fork! 

Add tomatoes, apples, onions and cooked veg and tofu to kale. Toss with dressing. Serve in bowls topped with sunflower seeds and sliced avocado. 

And there you have an extremely easy, healthy and filling lunch! We honestly could not stop eating this, the dressing and smoked tofu with the delicious apple crunch makes this amazing! Try it out!



Wednesday, July 9, 2014

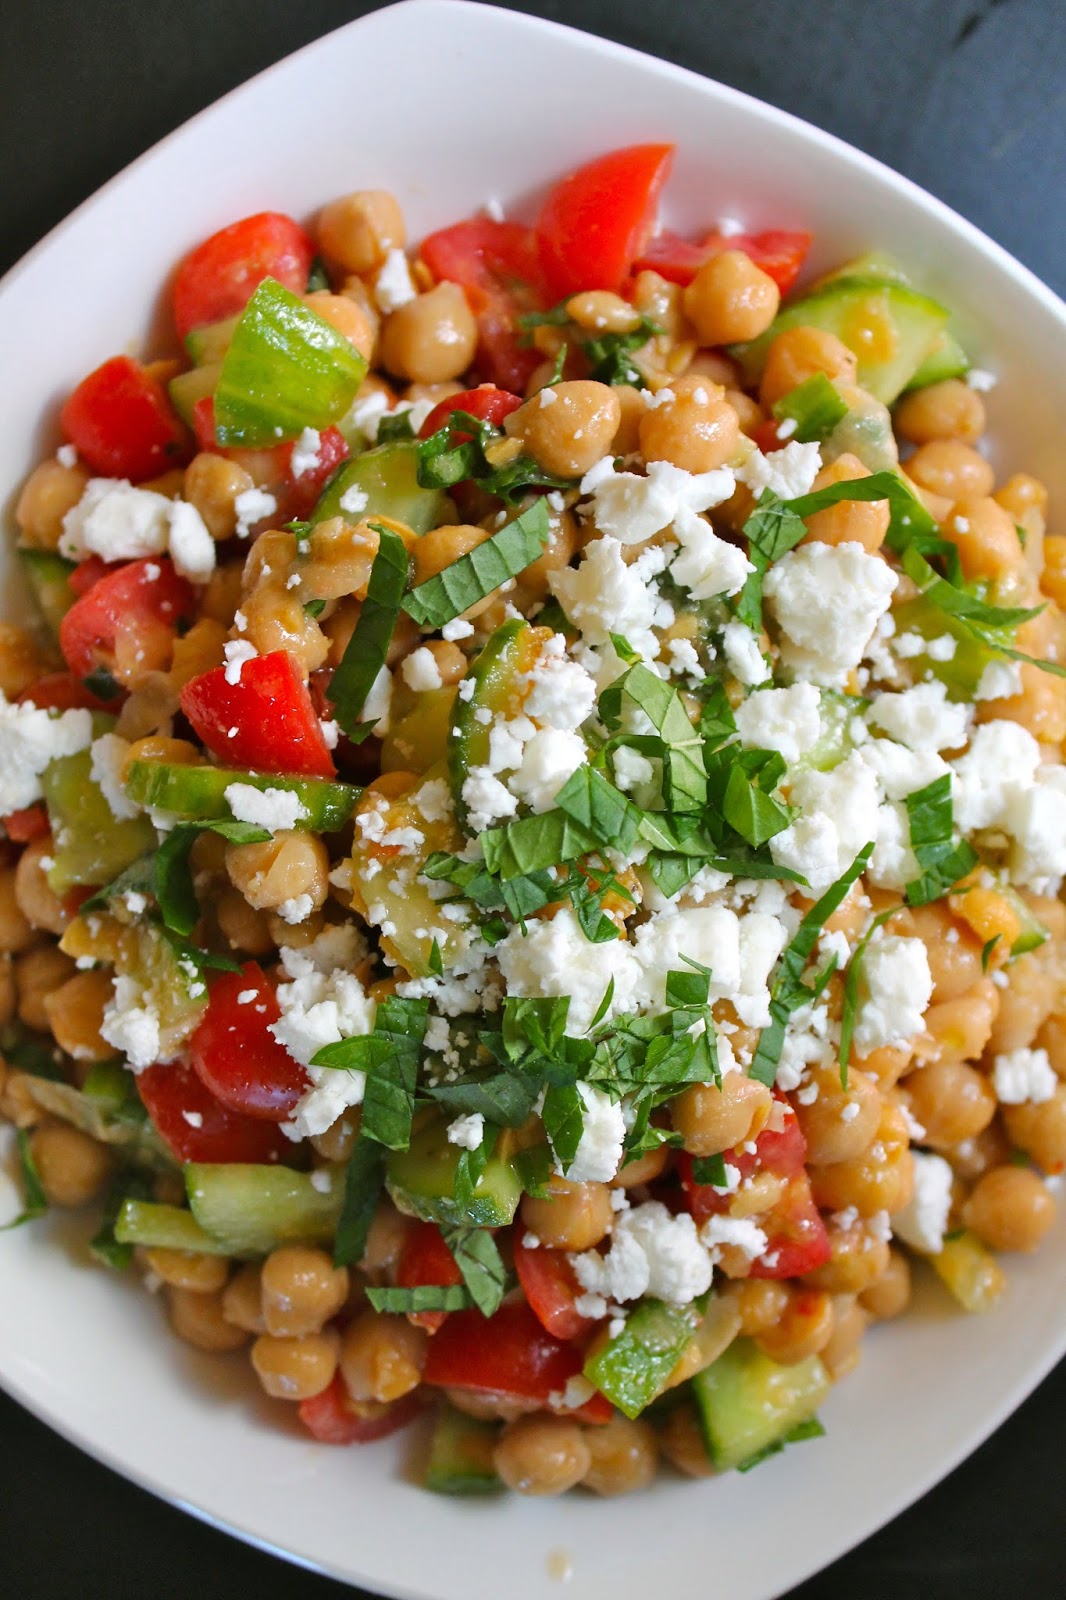
Chickpea, Feta, Mint, Chili Salad

I bought an organic mint plant at the grocery store the other day! And was so jazzed because A. Mint is my favourite herb and B. It was a total steal at 1.99!

Since I'm on a budget with my groceries, I've been scouting out deals and found chickpeas on sale for 99 cents a can, I'm like yeah I'll take a few of those.

I'm a major follower of everything Jamie Oliver, so when I googled chickpea salad and one of his blogger's recipes came up, I was in! If you know Jamie Oliver well you know he almost always includes a chili of some sort in his dishes, and this one was no exception! They also did a cool thing of warming up the chickpeas so that the dressing would infuse more into it, I thought it made a big difference!


1 can of chickpeas (460g)
10 cherry tomatoes chopped
half a cucumber, cubed
1/2 garlic clove, minced
2 tbsp red onion, chopped
2 tsp chopped red chill (or I used 1 tbsp of chili-garlic paste)
1 lemon, juiced
3 tbsp olive oil
Salt and Pepper, to taste
1 tbsp honey
Fresh mint, chopped
Feta cheese, crumbled

Heat up chickpeas in a skillet with a few tbsp of reserved liquid, cook just until heated through. Mash 1/5 of chickpeas and then dump everything in a mixing bowl.

Combine lemon juice, oil, salt, pepper, honey, chill and garlic (or garlic-chili paste) in a small bowl. Chop veggies and add to chickpeas, then add in dressing and toss to coat. Let sit in fridge to marinate for at least 2 hours.

Chop ribbons of fresh mint (about 10-12 leaves) and sprinkle over salad, crumble feta on top and serve!

*I added 1/2 a clove of garlic as well as substituted the chili for garlic-chili paste, I also added honey because I just find adding some sort of sweetness to salads makes it so much better and it goes well with the chili and mint, I also added cucumbers!!*

Sunday, July 6, 2014

Roasted Broccoli! Guest Post from Chris Wimmer (Health Smart Living)

Hey Everyone! We have a special guest writer for this week, Chris Wimmer from HealthSmartLiving.com. He's sharing one of his favourite recipes for roasted broccoli. His blog has a myriad of recipes that all look so unique a well as healthy! Some stand outs we spotted were: Buffalo Chicken Quinoa and Kale Fried Rice! There is also extensive info about how to juice and grow your own hydroponic veggies! So cool!

So welcome, Chris!


Broccoli…This is my great food challenge and would guess others share this challenge with me. While I know broccoli is packed with v itamins and fibre, I still have bad memories of getting a big head of broccoli on my plate as a kid. These memories have made me hesitate to ever try cooking it at home. However, as an adult I've learned a few simple recipes that make broccoli not only tolerate but actually delicious. Today I'm sharing a super simple yet tasty Roasted Broccoli recipe.


Why I love this dish. Pre-cutting the broccoli into bite sized chunks makes it super easy to eat (or scarf) . Sawing through bit chunks of veggies is a turn off for me. The small pieces of broccoli also gives you more spaces for the toasted panko/parmesan to stick and work its roasting magic.


We are going to our annual summer visit to my parents next and I can't wait to show my mom that I will finally eat broccoli.


Roast Broccoli Recipe

Ingredients
1 pound broccoli; trimmed into bite sized florets
2 tablespoons extra virgin olive oil
1/4 cup panko bread crumbs
1/4 cup grated parmesan
Salt and pepper to taste

Directions
Preheat oven to 425 degrees
Put broccoli, olive oil, salt and pepper in a mixing bowl. Set aside for later.
Spread bread crumbs on a cookie sheet and toast at 425 degrees of 2 minutes. remove bread crumbs and add to mixing bowl.
Spread broccoli mixture across the cookie sheet and roast for 8 to 19 minutes.
Remove from oven, move to serving dish, and mix in 1/2 cup parmesan cheese.


Chris Wimmer is from HealthSmartLiving.com where he blogs about cooking and juicing as ways to improve your health.

Thanks so much Chris for the cheesy and delicious looking broccoli recipe! We're always looking for ways to amp up our cruciferous vegetables and this looks like a perfect way to do it!!

Thursday, June 26, 2014

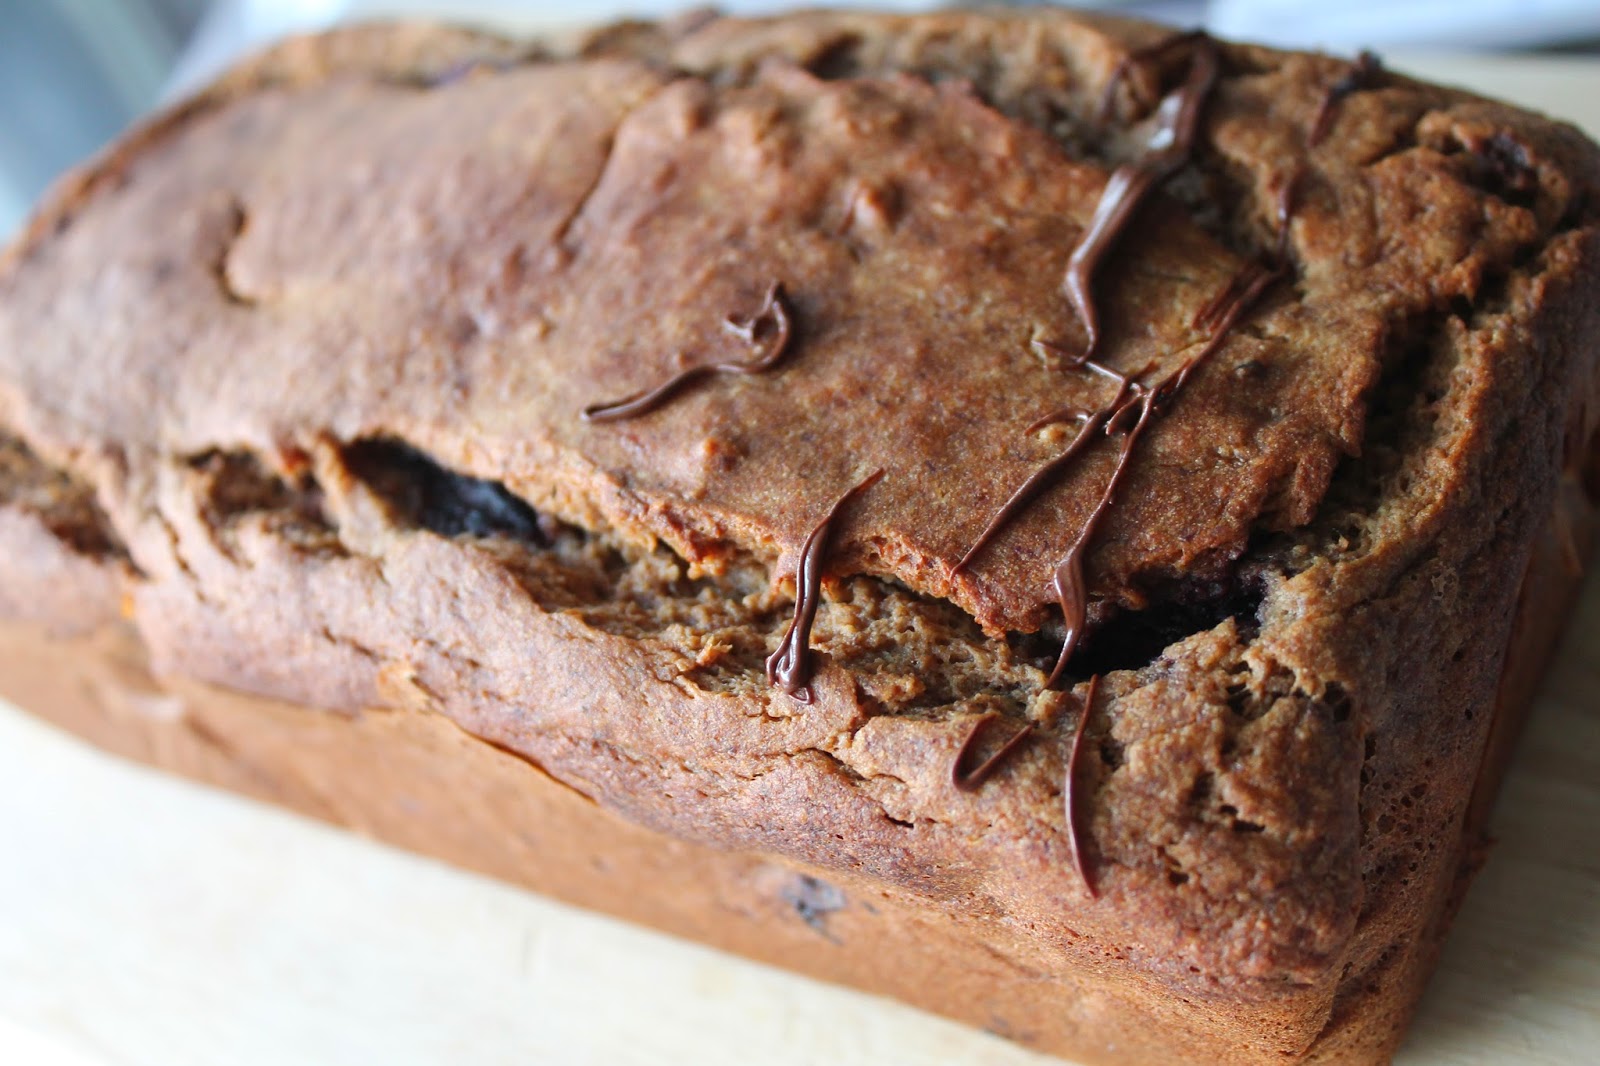
Black Tea Banana Cake with Blackberries

Have you guys ever infused tea into your cake batter?! Well get your tea bags out, now is the time! This cake totally blew me away, the flavour was rich and sophisticated and went extremely well with the blackberries. The key is to use really good quality tea bags so it actually tastes like the flavour of tea and not just pure bitterness.

The way we infused the tea was through almond milk. Just heat up almond milk like you would water, but take it off the heat right before it starts to boil, and steep a tea bag in it for 2-3 minutes.

You'll notice that there's not much sweetness in this cake, we found you don't need much sweetener because of the bananas and the tea is the highlight anyways.

I attempted to drizzle dark chocolate over top but left it on the stove for too long and burnt it! Nothing is sadder than a pot of burnt chocolate.

Berries!

Almost chocolate

Yeah...no chocolate


2 bananas, mashed
1/4 cup coconut oil
1 tsp baking powder
1 tsp baking soda
1 cup spelt flour
stevia, to taste
1/4 cup honey
1 egg
1/2 cup almond milk infused with black tea bag
1/2 cup blackberries

Combine flour, baking powder and baking soda. Set aside. In separate bowl, mix together mashed bananas, honey, egg and almond milk. Gradually stir into flour mixture. Add in melted coconut oil and frozen blackberries. Pour into a parchment lined loaf pan. Bake at 350F for 1 hour.

This cake reminds me of The B Book by Dr. Seuss. Does anyone remember this one?


Friday, June 20, 2014

Curried Quinoa Salad via Amy Castle!

Hey everyone!

Jenn and I would like to share with you a new go to salad of ours! We follow food vlogger, Amy Castle (What's Amy Eating) and absolutely love every single recipe she creates and you can't forget those Trader Joe hauls (still waiting for a Canadian TJ's!) ;).

We love quinoa and its versatility. It's a great replacement for rice and other grains. I haven't tried curry with quinoa (besides in Quinoa Croquette form) and we were curious about the combination in a salad. So here is Amy's curried quinoa salad (with a few modifications from us!)


1 cup quinoa (cooked)

Dressing:
3 tbsp greek yogurt
1 lemon, juiced
1/4 cup olive oil
1 tbsp curry powder (use more if you don't have the good quality kind)
1 clove garlic minced
1/2 tbsp grated ginger

Salad:
1 granny smith apple, chopped
1 red bell pepper, chopped
3 mini cucumbers chopped
1/4 cup raisins
1/4 cup pumpkin seeds
1/2 cup feta cheese crumbled
1/4 cup chopped cilantro

Cook quinoa, then chill in fridge until ready to use. Combine ingredients for dressing, Amy blends everything in a food processor, but we just whipped it around with a fork and it worked pretty well! Combine quinoa rest of salad ingredients. Pour dressing into rest of salad, toss until coated. We added pumpkin seeds for crunch, and cilantro for an extra hint of flavour and freshness.

This salad is honestly so so good! I was especially a fan of the addition of the raisins and chopped apple, it's sweet, savoury, salty, fresh, creamy and has a nice zing!

This is definitely going into our salad rotation (yes we have a salad rotation).

Wednesday, April 23, 2014

Vegan Miso Meatballs at Olivia's House!

This is the first time we've ever done a guest post on the blog and it was a blast! It's such a different experience cooking with someone else as opposed to when you're alone. When there's a problem to be solved you have an extra brain with extra ideas and the whole operation just goes so smoothly!

Olivia brought homemade cabbage rolls into work for lunch. She asked if I wanted to try some, to which I immediately said "Bleck, I don't like cabbage rolls". My mom used to make them all the time and I just can't get past the taste of cooked cabbage. It just...it tastes like feet ok! I also think cooked beets taste like dirt. What kind of Ukrainian am I! So anyway, I decided to try a TINY bite. It can't hurt, right? The cooked cabbage obviously made me gag, but the filling was ridiculous! It tasted exactly like ground beef, but it wasn't ground beef, it was a mix of nuts, cauliflower and beans! I was so floored. I immediately set up a cooking session at Olivia's house so we can make this for our blog. We turned the filling into Ikea-inspired meatballs and gravy.

Here is Olivia's vegan meatball recipe!

1/4 head of cauliflower, raw
1/2 cup lentils, canned
1 1/2 cup walnuts, raw or toasted
2 cloves garlic
2 tbsp oil (we used coconut)
1 tsp paprika
2 tsp salt
2 tsp cumin
fresh thyme and oregano (one stem of each)
3/4 cup gluten-free bread crumbs (you could easily substitute spelt flour or ground oats)

Buzz it all up in a food processor. Form into balls. Bake for 40 minutes on 350F flipping halfway through.


Balls of wisdom


Now for the gravy!

2 tbsp white miso paste
1/2 cup each of mushrooms and onions
1 clove garlic, chopped
1 cup boiling water
Starch/thickening agent (Tapioca starch, arrowroot powder, potato starch)

Heat up a saucepan and add some coconut oil. Add in mushrooms and onions and saute until tender. Add in miso and garlic. Stir up for another minute. Add in boiling water (it will essentially look like miso soup). Bring to a boil. Once it is boiling, reduce to a medium low heat and simmer uncovered for about 20-30 minutes or until the gravy has reduced by 25%. At this point, you could blend it up to make it smooth or leave the mushrooms and onions whole. Up to you! Gradually add in thickening agent by mixing about a tablespoon of the agent with a bit of the gravy, then add it in to the pot. Keep gradually adding it until you've reached a gravy consistency you are happy with.

Arrange meatballs in a dish with any other roasted veg you desire. We roasted up some cauliflower with crushed chipotle peppers. Yum! Pour on the gravy and garnish with green onions.

Caul-eeee

Dish happy


Saturday, April 19, 2014

Peanut Butter, Banana, Choco Chip Pancakes! (3 ingredient batter!)

I'm sure most health foodies are now aware of the incredibly simple pancake recipe consisting only of banana and eggs. This is a major break through considering pancakes are usually loaded with flour, oil and sugar. These are so accessible (who doesn't have a banana and egg hanging around) and actually taste pretty darn good!

I've experimented with a few different recipes, one was 2 eggs to 1 banana, another 3 eggs to 1 banana and the last one was 1 egg to 1 banana. After making all three, I prefer the 1 egg to 1 banana, although it tasted the most strongly like banana it was the most moist, I found the more eggs I put in the drier the pancakes were.

I decided to add some peanut butter to add a peanut-ty twist and to create a thicker batter.


2 eggs
2 bananas
2 tbsp peanut butter
Salt
Vanilla extract (or cinnamon!)
Chocolate chips

Combine the eggs, bananas, and peanut butter (salt and vanilla extract) in a food processor, or just mash it up with a fork! Spoon batter onto frying pan, sprinkle with chocolate chips and cook on LOW for 3 minutes, flip and cook for another 1-2 minutes.

PB-Honey Spread

1 tbsp honey
2 tbsp peanut butter

Combine both ingredients together and spread onto pancakes. So good! I've enjoyed these for breakfast, dinner and after workouts. Adding in a scoop of protein would make these super charged!


Thursday, April 3, 2014

Pineapple-Coconut Upside Down Cake w/ Whipped Coconut Cream

It never occurs to me to put pineapple in things. If I do it's often for a pina colada spin on a smoothie or I suppose on pizza. But baking it into a cake resulted in one of the best cakes I've ever made! Pineapple upside down cake is a retro classic, and is made by layering pineapple rings, brown sugar and butter, baked underneath a basic cake batter. Then you simply flip it over to reveal the pine-appley goodness on the other side.

This cake is more along the lines of a coffee cake, made only with honey and coconut oil it is denser more like a doughnut texture. But honestly it goes so well with the pineapple, this cake is amazing! Can't wait to make it again!


1 1/2 cups spelt flour (or regular flour)
1/3 cup + 1 tbsp honey
6 tbsp coconut oil (melted and cooled slightly )
2 eggs
1/2 cup coconut, shredded
1 tsp baking powder
1/2 tsp vanilla extract
Pinch of stevia (to taste)
Pinch of salt

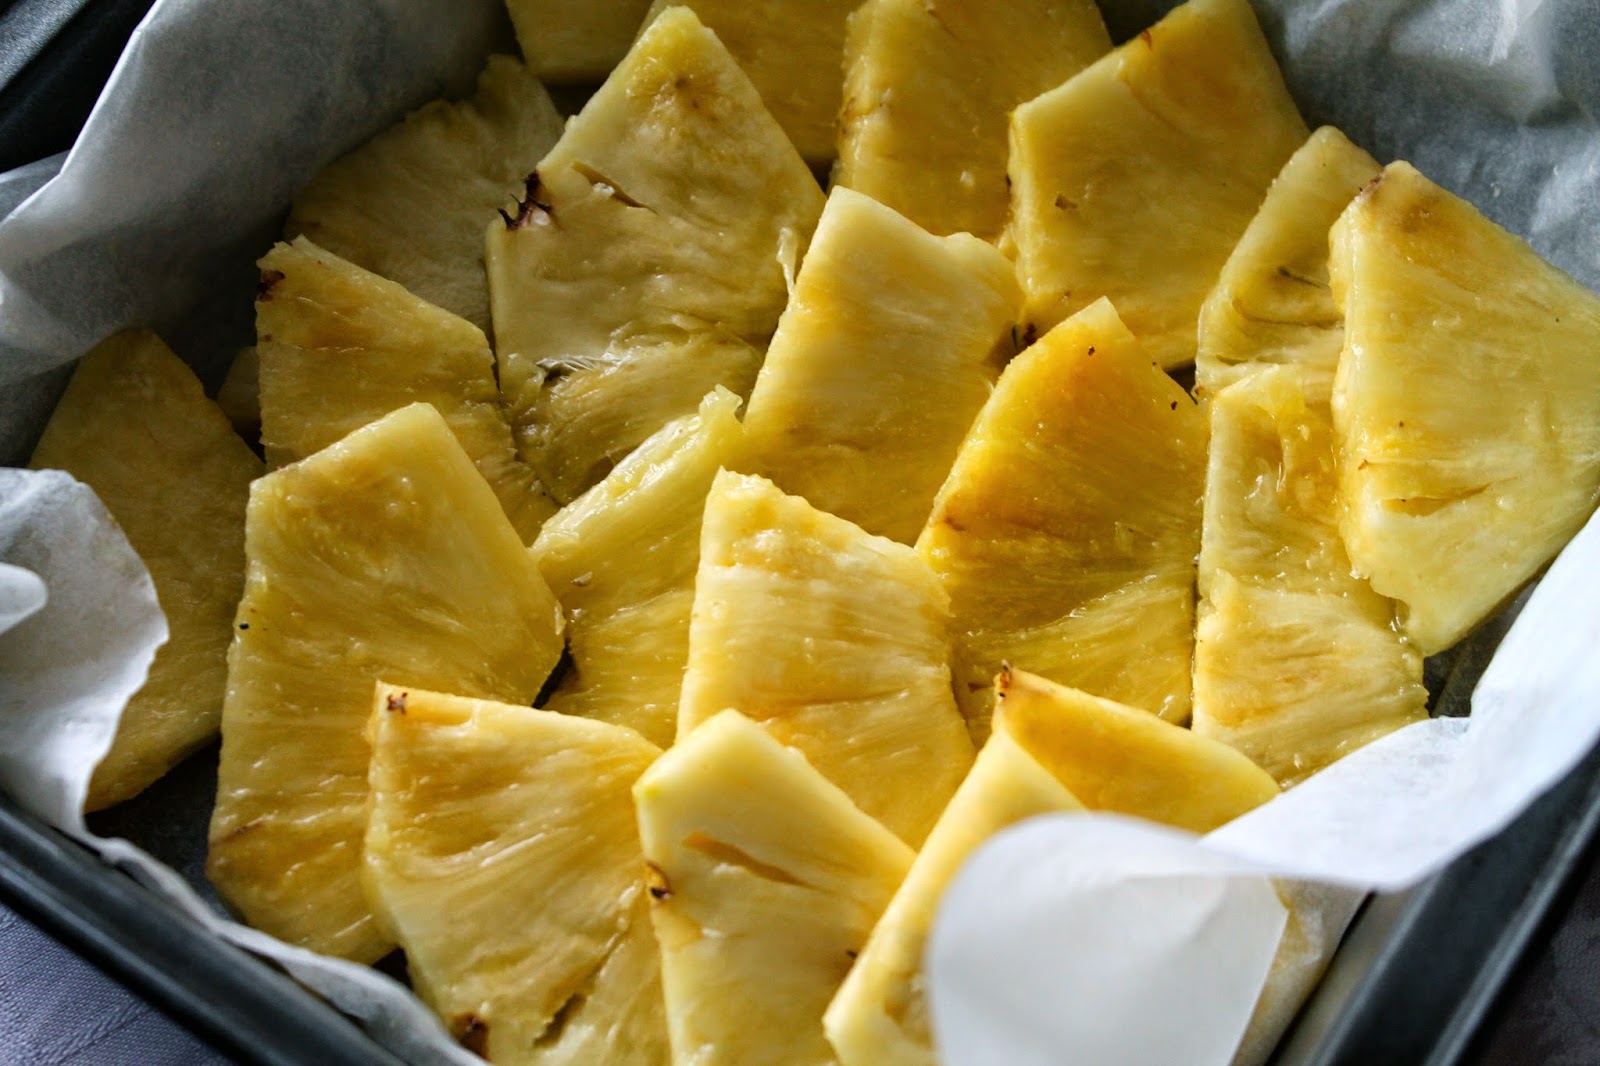
Combine flour, salt, stevia, coconut, and baking powder, stir to combine. In separate bowl combine honey, vanilla and eggs. Pour dry ingredients into egg mixture, stir until combined, then slowly mix in coconut oil. Slice pineapple thinly and layer onto a parchment lined 9X9 inch pan. Pour batter over top and bake for 30 minutes on 350F. Allow to cool (very important or else it'll break). Flip pan onto a plate or board to reveal pineapple side and voila!

Makes enough for 9 pieces.

Top with coconut whipped cream and toasted coconut!

(To make coconut whipped cream, use cream on the top layer of a can of coconut milk and whip it with electric beaters or food processor and voila!)


What are some of your favourite pineapple recipes?

Sunday, March 30, 2014

Baklava Cheesecake Bars

What is it about cheesecake that makes people go cuckoo over it. Whenever we go out to eat with our little sister, it is guaranteed, without fail that she will order a cheesecake for dessert. We once asked her why this was, and she said she just couldn't help it, whenever there's cheesecake it automatically trumps every other dessert surrounding it, is what she explained.

Well, we didn't have the right pan to make a cheesecake cheesecake, but we did make cheesecake bars! This way it's a small portion of an incredibly rich dessert that just feels like you're eating a snack. We added stevia and reduced some of the honey to make them a bit healthier. Remember cream cheese, greek yogurt and eggs all have lots of protein to balance out the glycemic index, so you won't get horrible sugar highs with this cheesecake!

These were honestly so deliciously creamy, we ended up making them twice. If you're a fan of baklava then you will really love these! Splurge on some good quality honey instead of billy bee, you'll really taste the difference in these.

 Drizzle honey and top with walnuts!


Crust
1/2 cup oats
1/2 cup spelt flour
2 tbsp coconut oil
2 tbsp honey

Filling
1/3 cup greek yogurt
1/4 cup good quality honey
1 tsp lemon juice
8 oz cream cheese
1 egg
2 tbsp egg whites
Stevia to taste
Pinch of salt

Combine crust ingredients, press into a small cake pan (9 X 9). Bake for about 8 minutes on 350F or until golden. Take out of oven, layer chopped walnuts and drizzled honey on the bottom, then pour in cream cheese mixture. Bake for another 30 minutes. Let cool for 30 minutes in fridge, or ideally overnight. And there you have it! Drizzle with more honey and top with more walnuts.

Sunday, March 23, 2014

Mocha Monkey Breakfast Cookies

If you love coffee flavoured sweet things, you will love these cookies! Jenn and I wanted to make breakfast cookies but not your usual dried fruit and nut cookies that you see frequently in coffee shops and on the web. We wanted something fun and different, enter the Mocha Monkey! Coffee, chocolate, banana, almond, and oat deliciousness! We didn't want them too sweet, there's only 3 tbsp honey plus a little stevia, which makes them perfect for breakfast!

These came out crispy on the outside and chewy and soft on the inside. If you like a crispier cookie, just flatten out before baking.


1/4 cup coconut oil
1 egg
1/4 cup almond milk
1 tsp instate coffee
1/4 cup almond milk
3/4 cup spelt flour
1/2 tsp baking soda
1 tsp baking powder
3 tbsp honey
1/2 cup almonds
1/3 cup chocolate chips
1/3 cup banana chips crumbled 
Stevia to taste (we added about 1/4 tsp)

Combine dry ingredients including instant coffee, mix eggs and almond milk. Combine wet into dry, add coconut oil, and almonds, chocolate chips and banana chips. Bake for 15-16 minutes at 350F.

These were honestly so so good! I always underestimate coffee flavour in baked goods and desserts. If you haven't tried coffee in cookies definitely give these a go! We ate the whole plate in less than an hour.

Tuesday, March 18, 2014

Sweet Potato Goat Cheese Quiche

This is our first ever quiche! Can you believe it? I think I had one once at Cultures salad bar in the mall, but that was way back in the day. To us, quiche represents adventure, venturing out into the abyss that is eggs and cheese, which is kind of hilariously sad considering quiche is a staple to most people. But after making this version involving goat cheese and our favourite veggie: the sweet potato, it's safe to say quiche is the word.

We were inspired by Coconut and Quinoa's recipe for Sweet Potato Quiche. The only thing is we substituted the cream for milk and substituted the swiss cheese for more goat cheese. It turned out pretty rich and creamy so no worries if you don't have heavy cream, just sub milk in!

This is super super simple, just look at the number of ingredients. And although there's not much to it, it's incredibly delicious! We just kept saying, this is so good, this is so good, why is quiche so good, ahh! etc. This would be the perfect thing for brunch or if you want to bring something vegetarian but also fancy to a potluck. (Yes, potlucks aren't just for the middle aged). The goat cheese makes it so velvety smooth! And it goes surprisingly well with the sweet potato. You can sub arugula or spinach for the parsley, or add in some red onion!

You could mix and match your ingredients too, the combinations are endless! One veggie, one cheese and one herb. We thought of, red pepper, feta and oregano; or potato, cheddar, and chive!


Crust:
1 cup spelt flour
1/4 cup coconut oil, melted
1/2 tsp salt
1/4 cup warm water

Filling:
1 small sweet potato, cubed and roasted
1/3 cup crumbled goat's cheese
Handful of chopped parsley
3 eggs
1 1/4 cup organic 2 % milk
1/4 tsp salt
Black pepper

Combine ingredients for crust, pat into pie plate and flute (make a fancy design) around the rim. Once potatoes are roasted add into pie crust along with cheese and parsley. Pour egg mixture over top and bake on 350F for 45 minutes, I only baked mine for 30-ish possible 35 min. You'll know when it's done when the egg mixture is puffed and cooked through (it shouldn't wiggle when you shift the pan).  

Now that we've made quiche once, we will never again under-estimate quiches and their ridiculously easy and economical deliciousness.


Thursday, February 27, 2014

Black Forest Cookie Tarts topped with Greek Yogurt

These tarts were an absolutely delight. If you love chocolate with fruit, this is your kind of dessert! The cookie crust is what makes it extra fun. They are completely grain-free and are even topped with healthy greek yogurt instead of whipped cream!

cherry immersion
pretty please! with a cherry on top?

Crust:
1 cup almonds, ground
2 tbsp cocoa
2 tbsp coconut oil
1 tbsp honey
Salt

Filling:
1/2 cup bittersweet chocolate chips (melted)
1 cup coconut milk
1 tbsp honey (or more to taste)

Fresh cherries, halved
Greek yogurt (add honey to sweeten)

Combine ingredients for crust, spoon into muffin tin, pat around the sides until tart/cookie cup is formed, bake 350F for 8-10 minutes.

Mix filling ingredients, pour into cooled cookie tart crusts, drop 2 cherry halves into filling. Refrigerate until filling set (a few hours). Once set, spoon greek yogurt over tarts and top with cherries and cocoa powder!

Makes 6 sweet little tarts!

The yogurt looks exactly like whipped cream!


You could make so many different kinds of tarts with this recipe! Try substituting the cherries for bananas or making a chocolate chip cookies crust by subbing flour for the cocoa powder.


Sunday, February 23, 2014

Choco-Peanut Butter Banana Puddings! (No cook + vegan!)

These were kind of made by fluke. We originally set out to make whipped coconut cream that was sturdy enough to stand on its own. But since we didn't have an electric beater, I beat it by hand with a whisk. It worked! We didn't have the stiff peaks we wanted, but the billowy cream was perfect for puddings!

We were melting chocolate for delicious (and vegan!) Black Forest tarts (recipe posted soon). So we added that in along with some coconut sugar and peanut butter and presto - pudding!

1 can full fat coconut milk, whipped with whisk to best of ability
3 tbsp coconut sugar
1/4 cup natural peanut butter
1/4 cup melted semi-sweet chocolate
Dash of vanilla
Dash of salt
Bananas and chocolate chips for decoration

Whip coconut milk (we used Thai Kitchen and believe it to be the best brand to use to make whipped cream, all the others seemed a little pulpy). Take out 4 ramekins or small containers. Fill each to the rim with pudding mixture. Place in fridge to cool and set (overnight preferably but a few hours would do fine too.) We decorated ours to look like mice (originally they were supposed to be bears but just ended up looking more mousy, we added tails made out of chocolate chips and peanuts!)


These would be perfect for kids, not that we're saying adults can't eat these too, I mean who doesn't love adorable puddings.